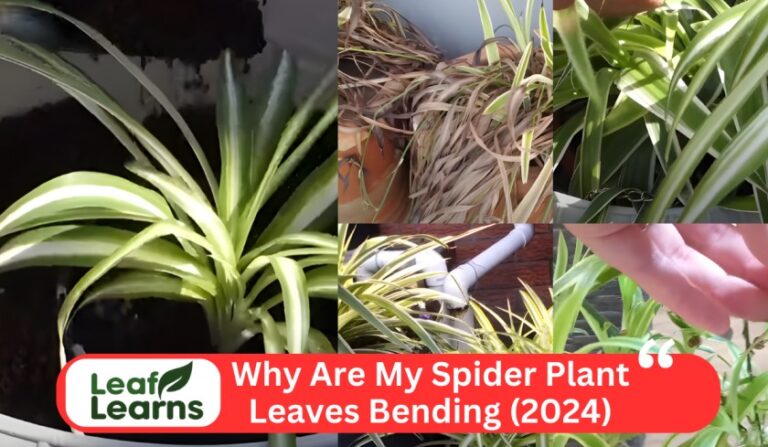
4 Main Reasons Why Is My Spider Plant Dying (2023)
Spider plants, prove to be enduring and versatile companions for the home. But Spider plant dying is the main questions between the people, In spite of their hardiness, spider plants can also face challenges, leaving you wondering, “What does my spider plant need?
Contents
- 1 Spider Plant Charm: A Brief Overview
- 2 Common Concerns: Unraveling the Clues
- 3 Signs and Symptoms of a Spider Plant Dying
- 4 Common Causes of Spider Plant Decline
- 5 Diagnosing the Problem
- 6 Reviving a Dying Spider Plant
- 7 Identifying and treating pests and diseases
- 8 Pruning techniques for a healthier plant
- 9 Troubleshooting Specific Issues
- 10 Repotting and Propagation
- 11 Unraveling the Repotting Dilemma: A Chronicle of Spider Plant Distress
- 12 Browning Tips and Beyond: Navigating the Complexities of Spider Plant Dying
- 13 FAQs
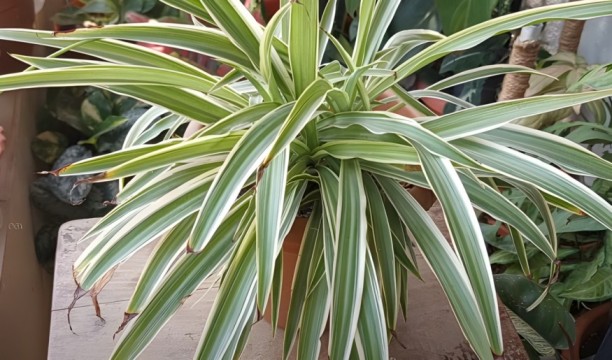
Spider Plant Charm: A Brief Overview
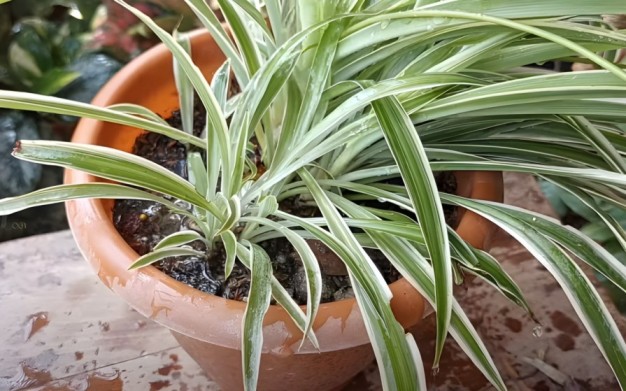
Due to their ease of care and ability to purify the air, spider plants have gained global popularity. In addition to the long, cascading leaves, these plants also produce adorable spiderettes, which add a charming element to the plant.
| Symptom | Possible Causes | Solutions |
| Yellowing leaves | 1. Overwatering | 1. Allow soil to dry between waterings |
| 2. Underwatering | 2. Water more regularly, ensuring proper drainage | |
| 3. Poor soil drainage | 3. Repot in well-draining soil | |
| 4. Too much direct sunlight | 4. Move to a location with indirect sunlight | |
| Brown tips or edges | 1. Low humidity | 1. Increase humidity, mist the plant or use a humidifier |
| 2. Overfertilization | 2. Reduce fertilizer or flush the soil with water | |
| 3. Watering with hard water | 3. Use distilled or filtered water | |
| Wilting or drooping | 1. Underwatering | 1. Water more frequently, ensuring thorough saturation |
| 2. Root rot | 2. Check roots for rot, trim affected parts, repot if needed | |
| 3. Too much sunlight | 3. Move to a shadier location | |
| 4. Pest infestation (e.g., spider mites) | 4. Treat with insecticidal soap or neem oil | |
| Stunted growth | 1. Lack of nutrients | 1. Fertilize with a balanced, diluted liquid fertilizer |
| 2. Root-bound | 2. Repot in a larger container if roots are congested | |
| 3. Poor soil quality | 3. Repot in nutrient-rich soil | |
| Yellow or brown spots on leaves | 1. Fungal or bacterial infection | 1. Trim affected leaves, treat with fungicide or bactericide |
| 2. Watering with cold water | 2. Use room temperature water for irrigation | |
| 3. Chemical exposure (e.g., household cleaners) | 3. Keep the plant away from potential contaminants |
Common Concerns: Unraveling the Clues
Spider plants can exhibit signs of distress due to various factors, including:
- A garden’s leaves can yellow, droop, or turn brown when they are overwatered or underwatered.
- Leaves can be pale from insufficient light, whereas they can be scorched by excessive direct sunlight.
- It is possible to burn salt by overfertilizing, while lacking fertilizer can hinder growth.
- Changing temperatures can stress plants, as can dry air causing brown leaf tips.
- Invaders like mealybugs and spider mites can damage and weaken plants by feeding on their juices.
Signs and Symptoms of a Spider Plant Dying
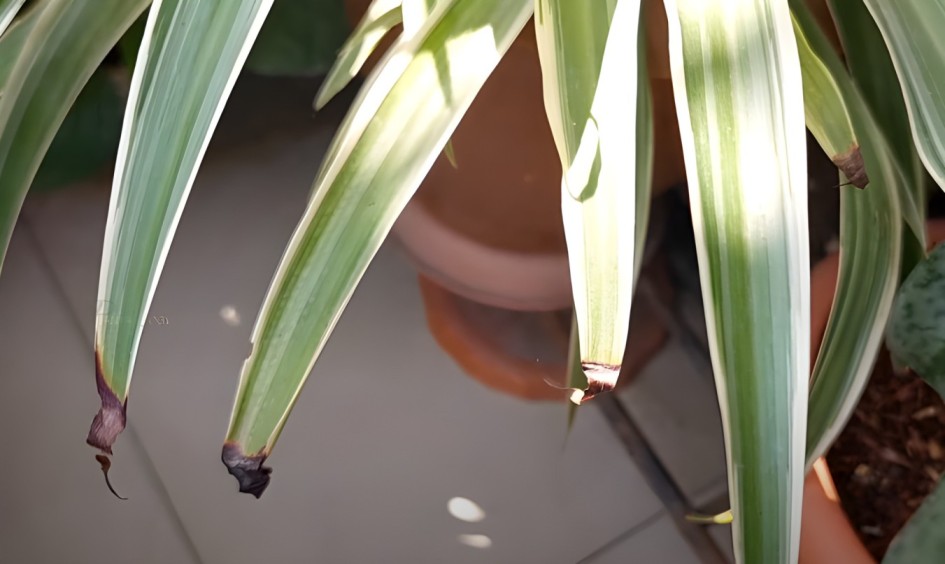
Brown tips on spider plant leaves
There are a variety of reasons why spider plant leaves develop brown tips. These include overwatering, underwatering, too much light, or not enough humidity.
Brown tips may indicate that a plant is dying, especially if they are accompanied by yellowing or drooping leaves.

Here are some of the signs and symptoms of brown tips on spider plant leaves:
- Dry, crispy brown tips: This is usually caused by underwatering.
- Soft, mushy brown tips: This is usually caused by overwatering.
- Brown tips with a yellow halo: This is usually caused by too much light.
- Brown tips that are curled up: This is usually caused by not enough humidity.
Wilting and drooping
Wilting Leaves
- The leaves become limp or floppy and lose their turgidity.
- Yellowing, browning, or crispy edges may appear on affected leaves.
Drooping Leaves
- A leaf hangs downwards after losing its upright posture.
- There may be drooping or collapsed leaves throughout the plant.
Often, these symptoms result from underlying problems like poorly watered plants, inadequate light, and nutrient deficiencies.
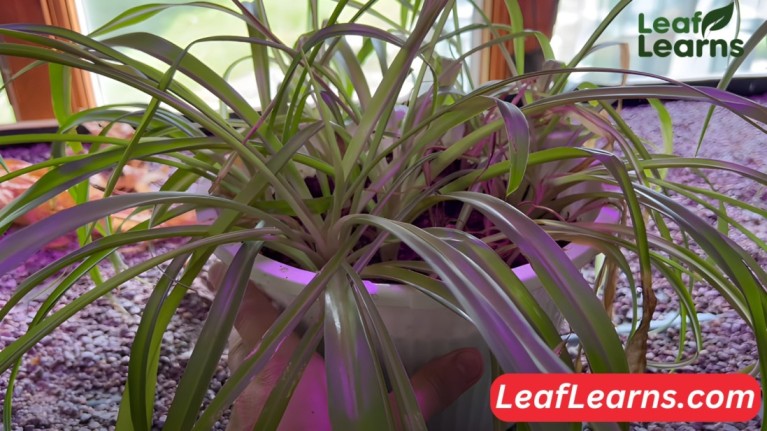
Yellowing of leaves
There is a disheartening yellow hue to the leaves of your once vibrant spider plant. There are ways to revive your beloved plant after this transformation, so do not be alarmed.
It is often a sign that underlying issues need to be addressed when spider plants have yellowing leaves. Among the causes of this problem are overwatering, underwatering, insufficient light, nutrient deficiency, and environmental stress. For your plant’s health to be restored, you must identify the root cause.
Overwatering results in waterlogged soil, which suffocates the roots and turns the leaves yellow. When the leaves are underwatered, they become dry, crispy, starting at the tips.
Bright, indirect light is ideal for spider plants. The leaves will eventually turn yellow if kept in a dimly lit area. The leaves can also turn brown or yellow when exposed to excessive direct sunlight.
In the absence of nutrients, especially iron, leaves can turn yellow while the veins remain green, a condition known as chlorosis. Yellowing of leaves can also be triggered by environmental stressors, such as dry air or sudden temperature changes. And prevent the spider plant dying.
Residue, spots, or holes on leaves
There can be residue, spots, or holes on the leaves of a declining spider plant.
Residue: Scale insects, mealybugs, and aphids may be infesting your spider plant if you see sticky or waxy residue on its leaves. Plant sap is consumed by these pests, which leave behind honeydew.
Spots: Underwatering, overwatering, sunburn, or fungal diseases can all cause brown spots on spider plant leaves.
The spots on the leaves are most likely caused by underwatering if they are small and appear on the tips. The spots may be caused by overwatering if they appear in the middle of the leaves.
Holes: There are many types of pests that can cause holes in spider plant leaves, including caterpillars, snails, and slugs. They create holes of varying sizes by munching on the leaves.
Leggy growth and lack of new growth
In addition to having cascading foliage, spider plants are easy to care for. The problem begins when they become leggy or stop growing. A lack of light usually results in leggy growth with elongated stems and sparse foliage.
Different factors can contribute to a lack of new growth, such as nutrient deficiency, root-bound conditions, or pest infestations.
Find out what is causing your spider plant to decline so you can revive it. Provide it with brighter indirect light if it is leggy.
To prevent nutrient deficiency in soil, fertilize if new growth isn’t occurring. Root-bound plants can be replanted into larger containers, and pest infestations can be treated with insecticidal soap or neem oil.
It is possible to restore the vibrant foliage of your spider plant and make it flourish once more if you take proper care of it.
Common Causes of Spider Plant Decline
Overwatering and stagnant water
These conditions can quickly lead to root rot, a deadly disease that can destroy your beloved plant.
What is Overwatering?
It is possible to overwater your spider plant if you give it more water than it needs. Depending on the pot and the watering schedule, this can happen.
Continual moisture in the soil prevents roots from getting oxygen. A fungal infection causes root rot, which causes brown, mushy roots.
What is Stagnant Water?
When water remains in a pot and does not drain away, it is called stagnant water. Pots with poor drainage or saucers that are too deep may cause this problem. Root rot can also result from stagnant water, which breeds bacteria and fungi.
This is the first reason answer of Why Is My Spider Plant Dying.
Underwatering issues
Despite their ease of care, spider plants can be damaged by overwatering. This can lead to a number of problems, including:
- Brown leaves: The tips of the leaves will turn brown and dry out first.
- Drooping leaves: The leaves will become limp and droop.
- Stunted growth: The plant will not grow as quickly as it should.
How to tell if your spider plant is underwatered
Taking a look at your spider plant’s soil is the easiest way to tell if it’s underwatered. You should be able to touch the soil, but it shouldn’t be bone dry.
Place your finger just above your first knuckle if you’re unsure. Moisture in the soil indicates that your plant is not underwater. The soil should be watered if it is dry.
How to prevent spider plant underwatering
- You only need to water your spider plants once a week, but if the plant is in a sunny location or if the pot is small, you may need to water it more often.
- To prevent the soil from becoming waterlogged, use a pot with drainage holes.
- Plants should be planted in potting mixes that drain well. This will prevent the roots from sitting in water.
- This is the second reason answer of Why Is My Spider Plant Dying.
Insufficient or excessive light
Insufficient Light: Light that is bright and indirect is ideal for spider plants. A lack of light will cause them to show stress signs, such as:
- Stunted growth
- Pale leaves
Leaf drop and yellowing may even occur in severe cases.
Excessive Light: Too much direct sunlight can harm spider plants, even though they need light to survive. Oversunned spider plants may exhibit the following symptoms:
- Scorched leaves
- Brown or yellow leaves
Salt and mineral buildup
Soil salts and minerals can, however, cause problems. A high level of minerals in tap water or excessive fertilization can lead to this problem.
Symptoms of Salt and Mineral Buildup
Salt and mineral buildup on your spider plant can be detected by a few symptoms. These include:
- Brown tips on the leaves
- Yellowing leaves
- Stunted growth
- Wilting
How to Prevent Salt and Mineral Buildup
For spider plants, distilled water is the best option for preventing salt and mineral buildup. Alternatively, you can use a half-strength fertilizer solution or fertilize your plant less often. This is the third reason answer of Why Is My Spider Plant Dying
Pest infestation
In spite of their low maintenance requirements, spider plants can still become infected or killed by pests. You might be left wondering why your plant was damaged by these invaders.
Common Pests
- Insects such as spider mites build fine webs on leaves, causing them to yellow and drop.
- The yellowing, wilting, and sticky residue caused by mealybugs result from their feeding on plant juices.
Symptoms of Pest Infestation
- Discolored leaves: Yellowing, browning, or spotting on the leaves.
- Webbing: Fine webs on the leaves or around the base of the plant.
- Leaves and stems can be covered with honeydew, an adhesive substance made by pests.
Treatment
- You should isolate the affected plant from other plants in your house so that the pest does not spread.
- Pests should be removed manually by using cotton swabs dipped in rubbing alcohol. Neem oil or insecticidal soap can be used to rid the plants of spider mites.
- A good way to prevent spider mites and mealybugs is to introduce beneficial insects such as ladybugs and lacewings. This is the forth reason answer of Why Is My Spider Plant Dying.
Diagnosing the Problem
Check for signs of wilting, yellowing, or browning
Wilting Leaves
Drooping leaves and a loss of turgor are signs of underwatering in a spider plant. Plants are simply not receiving enough water to remain healthy.
Yellowing Leaves
Several factors can cause yellowing leaves, including nutrient deficiencies or overwatering. There is a possibility that excess fertilizer or tap water with high salt levels may be the cause of the yellowing along with browning tips.
Browning Leaves
Often, brown leaf tips indicate that the leaves have been underwatered or exposed to excessive sunlight. The browning could, however, be a result of root rot, caused by overwatering, if it is more extensive and affects the entire leaf.
Inspect the leaves for pests and diseases
There are a few problems that spider plants can have, despite the fact that they are generally low maintenance houseplants. Check for signs of trouble on your spider plant by following these tips:
Leaves
- Look for pests: Spider mites, mealybugs, and scale insects can be problematic for spider plants. Leaves can become yellow, wilted, or sticky due to these pests.
- Check for diseases: In addition to fungal leaf spots, spider plants can also suffer from bacterial soft decay. In addition to spots, discolorations, and mushy areas on the leaves, these diseases can also cause discolorations.
- Examine the color: Bright green is the color of healthy spider plant leaves. It may be a sign of a problem if the leaves are yellow, brown, or black.
- Feel the texture: Smooth, firm leaves indicate a healthy spider plant. You can tell if your leaves are mushy, crispy, or soft.
Assess environmental factors like light, temperature, and humidity
Having difficulty reviving your spider plant? Don’t fret! Diagnose the problem as soon as possible. Start by assessing its environmental requirements:
A dark corner or direct sunlight will cause spider plants to become leggy and their vibrant color will fade. On the other hand, bright, indirect light nourishes spider plants.
Place them away from drafts and vents, which can cause temperature fluctuations and stress. These tropical natives prefer warm temperatures, ideally 65-75°F.
A humidifier or a tray filled with water can be used to provide humidity for spider plants if your indoor air is dry.
Reviving a Dying Spider Plant
Watering tips and avoiding root rot
Don’t despair if your spider plant is suffering from distress. It only takes a few simple adjustments to your watering routine to restore it to health.
Watering Wisdom
Water spider plants regularly to prevent root rot. If the soil feels dry to the touch, water thoroughly after it has dried out slightly. If the soil still feels moist, water thoroughly after it has dried out.
Drainage Matters: Ensuring Proper Drainage
To prevent the soil from becoming waterlogged, choose a pot with drainage holes. If your current pot lacks drainage, consider repotting.
Signs of Root Rot: Watch for the Warning Signs
The symptoms of root rot include yellowing leaves, wilting leaves, and an unpleasant odor in the soil. Taking action quickly can prevent further damage if root rot is suspected.
Gently loosen the soil around the roots of the plant after removing it from its pot. Make sure there are no signs of discoloration or mushiness on the roots.
Revival Strategies
When you notice roots that are damaged or mushy, trim them gently away. You should repot your plant using a sterile potting mix in a fresh, well-draining container. Before watering again, allow the soil to completely dry out.
Prevention is Key: Establishing Healthy Habits
To prevent root rot from recurring, follow these simple tips:
- The soil should only be watered when it feels dry to the touch.
- Make sure the pot does not sit in water.
- Potting soil should drain well.
- A humid environment is preferred by spider plants, so monitor the humidity levels.
Providing proper lighting conditions
Houseplants, including spider plants, need bright, indirect light to thrive. Ensure that your plant gets morning sun by positioning it near an east-facing window.
The intense afternoon sun can scorch its delicate leaves, so do not place it directly in front of a south-facing window.
Consider adding a grow light to your home if you lack natural light. With these specialized lights, you will be able to provide your spider plant with the essential nutrients that it needs in order to flourish.
Put the grow light on a timer for 12-14 hours daily and place it a few inches above the plant.
Throughout the process of regaining strength, you will notice a renewed vitality in your spider plant. There will be new growth and vibrant green leaves, indicating the return of health to its foliage.

Addressing nutrient deficiencies
Identifying Nutrient Deficiency
You must first identify the source of the problem in order to revive your spider plant. Leaf yellowing, brown tips, and a loss of vibrancy are usually indicators of nutritional deficiencies.
Addressing Nutrient Needs
The next step is to replenish the plant’s essential nutrients once you’ve determined that nutrient deficiency caused the problem. In soil that drains well and is slightly acidic, spider plants thrive.
In the spring and summer, use a diluted liquid fertilizer that contains a balanced blend of nutrients.
Identifying and treating pests and diseases
There are several reasons why spider plant dying, including pests and diseases. There are several pests that can attack spider plants, including spider mites, mealybugs, and whiteflies.
A plant’s juices are eaten by these pests, which weakens it and causes its leaves to turn yellow or brown.
Identify pests on your spider plant by carefully inspecting the leaves. Inspect your home for spider mites by looking for tiny webbing.
Whiteflies look like tiny white insects that flutter around plants, and mealybugs look like small white cotton balls.
In case of pest infestations, you can treat them in a few ways. Neem oil or insecticidal soap can be used to rinse spider plant leaves. Commercial pesticides are also available, but follow instructions carefully.
The decline of spider plants can also be caused by diseases in addition to pests. A plant’s roots can become mushy and brown when they are infected with fungus, such as root rot. As a result, the plant will be unable to absorb water and nutrients, leading to its eventual death.
Be sure not to overwater your spider plant in order to prevent fungal diseases. Water the soil only when it is dry between waterings. Changing your spider plant’s pot with a drainage hole can also improve drainage. and through this we can prevent the spider plant dying.
Pruning techniques for a healthier plant
Identify Pruning Needs
Make sure your spider plant is in good health. Pruning should be done if you see brown, yellow, or damaged leaves. Pruning spider plants that have become overgrown promotes new growth and reduces their legginess.
Prune with Precision
By cutting the leaves at an angle, you can target the base of the affected leaves. Any spiderettes that grow from the main plant that are dead or diseased should be removed.
As a result, the plant concentrates its energy on growing healthily.
Post-Pruning Care
Ensure that your pruned spider plant is placed in an area with bright, indirect light. You should use a well-draining potting mix and moderately water it.
You should avoid overwatering the plant, which can cause it to suffer stress and prevent it from recovering.
Troubleshooting Specific Issues
Brown Leaf Tips
Even spider plants are susceptible to problems, despite their resilience. Leaf tips that are brown are a common issue. Several factors can contribute to this, including excessive fertilizer and sun exposure, fluoride in tap water, and drought stress.
Drought Stress
Spider plants’ leaves will turn brown if they do not receive enough water. Make sure you water your plant deeply and regularly in order to prevent this. Make sure the soil does not become bone dry between waterings.
Fluoride in Tap Water
It is possible for spider plants to become poisoned by fluoride present in some tap water. Test your tap water at home if you’re unsure whether it contains fluoride.
Using filtered water or rainwater on your spider plant is a better option if your tap water contains fluoride.
Excess Fertilizer
It is possible for the tips of your spider plant’s leaves to turn brown and burn if you fertilize it too much. During the growing season of your spider plant (spring and summer), only fertilize it.
To use liquid fertilizer, dilute it to half strength with a balanced formula. and prevent the spider plant dying.
Too Much Sun Exposure
Indirect light is best for spider plants. Spider plants’ leaves may turn brown and scorch if they receive too much direct sunlight. Move your spider plant to an indirect, bright location to prevent this.
Repotting and Propagation
With their cascading foliage and air-purifying properties, spider plants make excellent houseplants. Roots need more space as they grow, so they need more space as they grow. Your spider plant will stay healthy and happy if you repot it every 1-2 years.
Repotting Essentials
- Choose the Right Time: Spider plants do best when they are actively growing in spring or early summer.
- Select a Suitable Pot: Make sure the pot has drainage holes to prevent waterlogging and is slightly larger than the current one.
- Prepare the New Pot: Use a well-draining potting mix designed for houseplants in the pot.
- Repotting Process: Remove the spider plant from its current pot by gently loosening the roots. Fresh potting mix should be added to the remaining space in the new pot.
- Water and Care: Place newly repotted plants in a bright, indirect light location and water thoroughly.
Outdoor Adventures for Spider Plants
Can spider plants venture outdoors? Absolutely! During warm, frost-free months, your spider plant can enjoy a summer vacation on your patio or balcony. However, ensure it’s gradually acclimated to outdoor conditions and avoid direct sunlight.
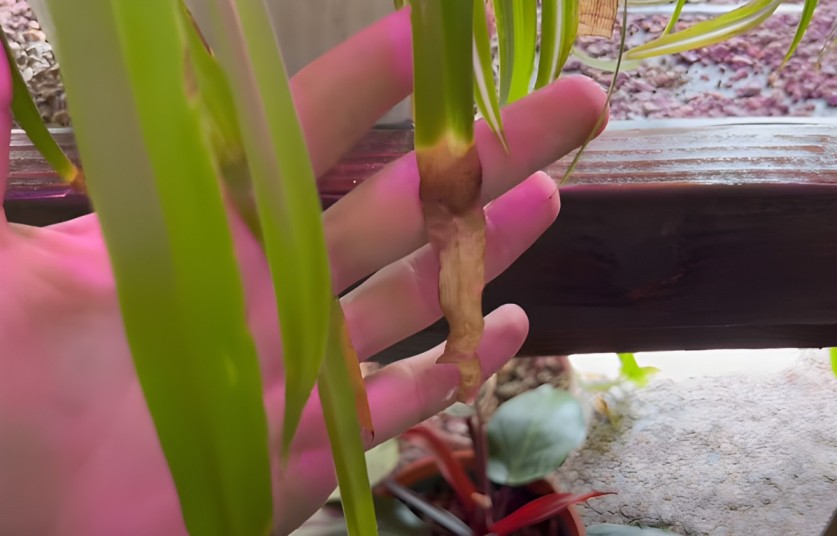
Propagation: Creating New Spider Plant Friends
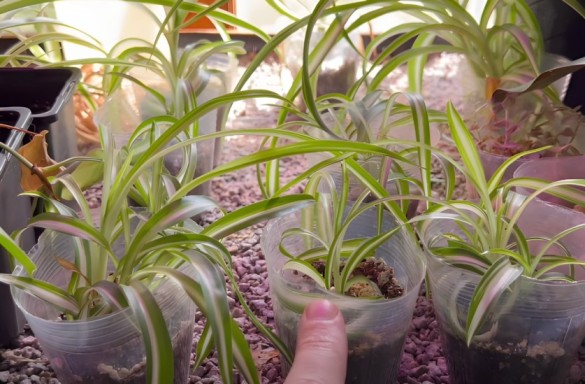
Your family and friends can enjoy spider plants’ greenery thanks to their ease of propagation.
- Gather Materials: water, a sharp knife or scissors, and rooting hormone are all required.
- Choose Spiderettes: Choose healthy spiderette plants, which grow along the runners of spider plants.
- Cut and Prepare Spiderettes: Make sure each spiderette has some leaves and roots before cutting it off the runner. Cut ends should be dipped into rooting hormone if using it.
- Rooting in Water: Submerge the spiderettes in water without touching the leaves. Until roots emerge, change the water several times a week.
- Planting in Soil: Plant the spiderettes in potting mix once they have roots of about 1-2 inches long.
- Care and Nurture: Make sure the newly potted spiderettes receive bright, indirect light, and water them regularly.
Unraveling the Repotting Dilemma: A Chronicle of Spider Plant Distress
After repotting, my spider plant started exhibiting signs of distress, causing me to question its well-being. The leaves turned yellow, drooped, and even wilted, leaving me puzzled about the appropriate course of action.
I wondered, “Should you water a spider plant after repotting?” This question echoed in my mind as I observed the brown tips and ends of the leaves, contemplating whether the browning was a result of underwatering or perhaps overwatering.
The cluster of concerns intensified as I noticed the plant getting limp, indicating a potential root rot issue. In my quest to revive the spider plant, I sought answers to various questions like, “Why is my spider plant turning yellow after repotting?” and “How to revive a wilted spider plant?”
Amidst the struggle to understand the nuances of repotting stress, another cluster of worries emerged. The once vibrant greenery now showcased brown tips and ends, raising questions like, “Why is my spider plant dying by brown at the tips?”
and “What causes brown ends on spider plants?” These queries led me to delve into broader spider plant issues, exploring reasons for its overall decline. I found myself pondering not only the general health of the plant but also potential pests and diseases, such as spider mites or aphids.
The intricacies of spider plant care intertwined with the peculiarities of its reactions to changes, leaving me determined to unravel the mysteries behind the browning, wilting, and drooping of my once-thriving spider plant. So here is all the reasons that why is my spider plant dying.
FAQs
How do you save a dying spider plant?
It is typically easy to care for spider plants, but if it is looking droopy and unhealthy, you may be able to save it. Overwatering and underwatering should be checked first.
Soggy soil should be reduced watering and allowed to partially dry. Increasing watering and checking for pests are the best ways to deal with dry, crispy leaves.
Your spider plant also needs bright, indirect light, so be sure to give it enough. The yellowing of the leaves could be an indication of nutrient deficiencies. A balanced liquid fertilizer can be used to fertilize your plant.
Why is my spider plant turning brown?
If your spider plant is turning brown, there are a few possible causes. Overexposure to direct sunlight is one possibility. You should move your spider plant to a shadier spot if you want it to thrive.
Spider plants prefer bright, indirect light. The plant may also be getting insufficient water. Regularly water your plant, particularly during the summer.
Finally, pests or diseases can cause spider plants to turn brown. Your plant can be treated with insecticidal soap or neem oil if any pests are present.
How do you fix an unhealthy spider plant?
A spider plant that is unhealthy requires an underlying problem to be addressed. Overwatered plants should be watered less and the soil should be allowed to dry out slightly.
It should be watered more if it is underwatered and pests should be checked. Move the plant to a shadier spot if it does not receive enough light.
Feed the plant with balanced liquid fertilizer if the plant suffers from nutrient deficiency. Last but not least, apply insecticidal soap or neem oil to the plant if it is infested with pests.
How often should you water a spider plant?
It is important for spider plants to have moist soil, but it should not be soggy. Your plant may require watering every week or two during the summer months.
Winter is a good time to water your plants less often, but ensure the soil doesn’t dry out completely.
Do you cut off the brown tips of your dying spider plant?
If your spider plant is dying, you can cut off the brown tips. A healthy new leaf will be produced as a result of this action, and the plant will not be damaged by it.
The brown tips of the leaves should be trimmed off with a sharp knife or scissors.
Should you remove dead leaves from spider plant?
The dead leaves on your spider plant should be removed. Your plant may look less attractive when it has dead leaves on it, which can harbor pests and diseases.
The dead leaves should be removed from the plant using a knife or scissors.
Should you cut off the brown leaf tips on a spider plant?
Spider plants do have brown leaf tips that you can cut off. Plants will not be harmed by this and may be able to concentrate on growing healthy new leaves as a result.
Make sure the brown tips of the leaves are trimmed off with a sharp knife or scissors.
How do you fix brown leaf tips on spider plants?
Fixing brown leaf tips on spider plants requires addressing the underlying issue. Overwatered plants should be watered less and the soil should be allowed to dry out slightly.
Underwatered plants require more water and need to be checked for pests. Plants should be moved to shadier areas if they don’t get enough light.
Fertilize the plant with a balanced liquid fertilizer if it is deficient in nutrients. You can also use neem oil or insecticidal soap to treat an infested plant.
Multiplying spider plants: Is it a good sign?
It is a good sign when spider plants multiply! Your plant is happy and healthy when it shows this sign. Runners—long stems with small plantlets at the ends are sent out by spider plants to reproduce.
A spider plant can be grown from one of these plantlets by rooting it and growing it into a new one.