How to Propagate Monstera by Water, Soil, and Air layering (2023)
Indoor plant enthusiasts worldwide have been charmed by Monstera plants’ heart-shaped leaves and with different propagate monstera methods. With their lush greenery and a sense of tranquility, these tropical beauties bring a touch of the exotic to our homes.

It is not just their aesthetic appeal that makes Monstera so appealing. Even those with a less-than-green thumb can care for them with relative ease due to their incredible resilience and adaptability.
Contents
- 1 The Fascination with Propagating Monstera
- 2 Importance of understanding various propagation methods
- 3 Taking A Monstera Cutting
- 4 What Does A Monstera Cutting Need?
- 5 How To Take Your Monstera Cutting
- 6 The Propagation Process
- 7 Propagation Methods
- 8 Monstera Care
- 9 Plant Characteristics
- 10 Exploring Monstera Propagation Methods: From Nodes to Aerial Roots
- 11 Mastering Monstera Propagation: Techniques,and Tips
- 12 FAQs
The Fascination with Propagating Monstera
Propagation success depends on understanding its nuances. Cutting stems from healthy stems and putting them in rooting medium is the most common method.
Roots are formed while still attached to a stem when air layering is performed. Using water to propagate stem nodes is a simple yet effective technique.
Importance of understanding various propagation methods
Developing a deep understanding of Monstera propagation requires more than horticultural knowledge; it involves mastering the delicate balance between science and art.
We gain a deeper understanding of these remarkable plants through a deeper understanding of the different propagation techniques, fostering a connection beyond mere admiration.
Taking A Monstera Cutting
Can You Grow Monstera From A Leaf?
A popular houseplant known for its large, heart-shaped leaves with distinctive fenestrations, Monstera delicious is also known as Swiss cheese plant or split-leaf philodendron.
It’s common to propagate Monstera by stem cuttings, but can you grow it from a leaf as well?
It is unfortunately not possible. During the growth process, new growth emerges at nodes along the stem of Monstera leaves, which lack them. Roots and new stems cannot grow on Monstera leaves without nodes.
The role of Monstera cuttings in propagation
The stem cutting method of propagating Monstera is an effective and rewarding way to multiply your plants.
The nodes in stem cuttings can lead to new growth. Water or soil, in combination with nodes, can be used to root the nodes and produce new leaves, resulting in new Monstera plants.
Necessary considerations before taking a cutting
Before embarking on your Monstera propagation journey, consider these factors:
- Ensure your Monstera plant is healthy and mature with strong stems and vibrant foliage. Stressed or diseased plants should not be cut.
- Identify a suitable stem node: Locate a suitable stem node. The petiole is the stalk that connects the stem to the leaf.
- Sharp garden shears or a clean knife should be used to make clean cuts. Rooting success can be hampered by dull blades.
- The rooting medium you should use depends on whether you want your cutting to grow in soil or water. Soil provides direct access to nutrients, while water propagation allows easy observation of root development.
What Does A Monstera Cutting Need?
Whether you’re a seasoned plant enthusiast or a budding green thumb, propagating Monstera cuttings is an exciting endeavor that adds to your plant collection. But what exactly do these cuttings need to thrive and transform into flourishing Monstera plants?
The Essentials for Monstera Cutting Success
- A warm and humid environment is best for Monstera cuttings, mimicking their tropical origins. The ideal temperature range is 65-75°F (18-24°C) with a humidity level of 50-60%.
- Indirect, bright light is essential to the growth of Monstera cuttings. The delicate leaves can be scorched by direct sunlight.
- Choosing a well-draining rooting medium is important. For example, peat moss and perlite are two high-draining rooting mediums. Aerated soil prevents root rot and ensures adequate aeration.
- Maintain a consistent moisture level in the rooting medium without letting it get too wet. When roots are overwatered, they can rot, while when they are underwatered, they are stunted.
Addressing Common Concerns and Misconceptions
Myth: Monstera cuttings can root in direct sunlight.
The leaves of Monstera cuttings are susceptible to scorching from direct sunlight, preventing them from growing and surviving. Rather than bright, direct light, choose bright, indirect lighting.
Myth: Monstera cuttings need fertilizer to root quickly.
During the rooting phase, Monstera cuttings do not need to be fertilized. Root development can be hampered by fertilizer oversaturating the roots. Fertilizer should be introduced after the plant has established itself.
Setting the Stage for Optimal Growth
- It can take several weeks to root Monstera cuttings, so be patient. Don’t interfere with nature, just provide the necessary conditions.
- Root development should be monitored regularly by checking the rooting medium. A cutting should be transplanted into a pot once its roots reach 2-3 inches in length.
- As soon as your Monstera plant has been transplanted, ensure it gets ongoing care so it can thrive.
How To Take Your Monstera Cutting
Here’s a step-by-step guide on how to take a Monstera cutting
Step 1: Choose the Right Cutting
Choose a stem that has at least one node, which is the point where a leaf or aerial root emerges. Stems that are yellow, brown, or have visible pests should not be used.
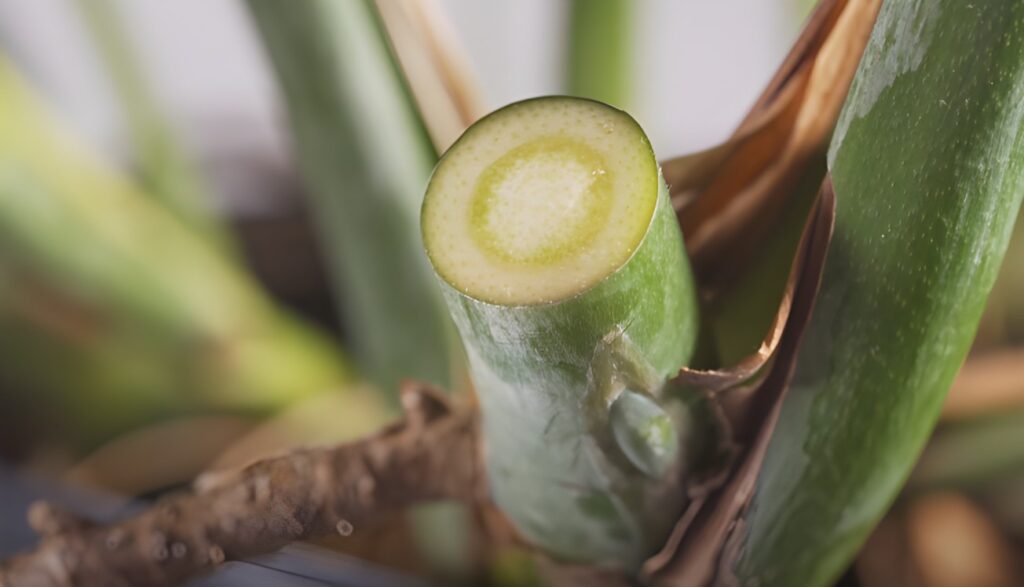
Step 2: Make a Clean Cut
If you want to increase the surface area for roots to develop, use a 45-degree angle and sharp, sterilized pruning shears to make a clean cut just below a node.
Step 3: Prepare the Cutting
In order to prevent rotting, you should remove any leaves that would submerge in water. In case your cutting has aerial roots, you may leave them on or trim them slightly.
Step 4: Root in Water or Soil
Depending on the type of cutting, you may root it in either water or soil. For water propagation, use a jar or vase full of filtered, fresh water.
For soil propagation, use a well-draining potting mix and keep it moist, but not soggy.
Step 5: Provide Bright, Indirect Light
Your cutting needs to be placed in a location where the leaves receive bright, indirect light. Avoid direct sunlight, which can scorch them.
Step 6: Monitor Root Growth
Check for root growth after a few weeks. If your cutting has roots about an inch long, you can transplant it to a pot after a few weeks. For water propagation, change the water every few days.
Tips for a Successful Cutting Process
- Prevent diseases from spreading by sterilizing tools.
- Put it in water or soil after the cut end has calloused over slightly.
- It may take several weeks for the roots to root, depending on the conditions.
Importance of Choosing the Right Cutting for Monstera
- Cuttings should be taken from a healthy, well-established monstera plant. Do not take cuttings from stressed or diseased plants.
- It is imperative to select cuttings with at least one node, the point where a leaf or stem emerges. Nodes contain dormant growth cells that are necessary to initiate rooting and new growth.
- Cuttings with mature leaves indicate a healthy plant with the ability to photosynthesize. Avoid cuttings whose leaves have yellowed or are damaged.
- Choose a cutting with a sturdy, medium-thick stem to help it root. Thicker or thicker stems may have difficulty supporting new growth.
- A clean, diagonal cut below a node should be made with a sharp, clean knife. Do not crush or damage the stem in the process.
The Propagation Process
In recent years, Monstera delicious has become a household favorite because of its iconic split leaves and captivating aerial roots. It is easy to propagate Monstera plants and share them with your friends and family, didn’t you know?
The Growth Stages: A Transformation Unfolds
When propagating Monsteras, begin by choosing a healthy stem cutting, ensuring it has at least one node, the location where roots emerge.
Provide bright, indirect light to the cutting by placing it in water or a well-draining potting mix.
As you propagate plants in water, you will observe delicate white roots forming. Your cutting should be transplanted into a pot filled with fresh potting soil when its roots reach about 2 inches in length.
When roots are propagated by soil, they develop directly from the node. Maintain a dry but moist soil by monitoring the soil moisture
Common Challenges and Troubleshooting
- It is possible that your cutting has root rot if its stem is brown or mushy. You should remove the affected parts and replace them with a potting mix that drains well.
- Stress is indicated by yellowing leaves. Make sure your Monstera receives adequate light and is free of pests by inspecting, watering, and adjusting the watering.
- It takes patience to grow slowly. Several weeks or months may be required for monstera propagation. Overwatering should be avoided at all costs.
Propagation Methods
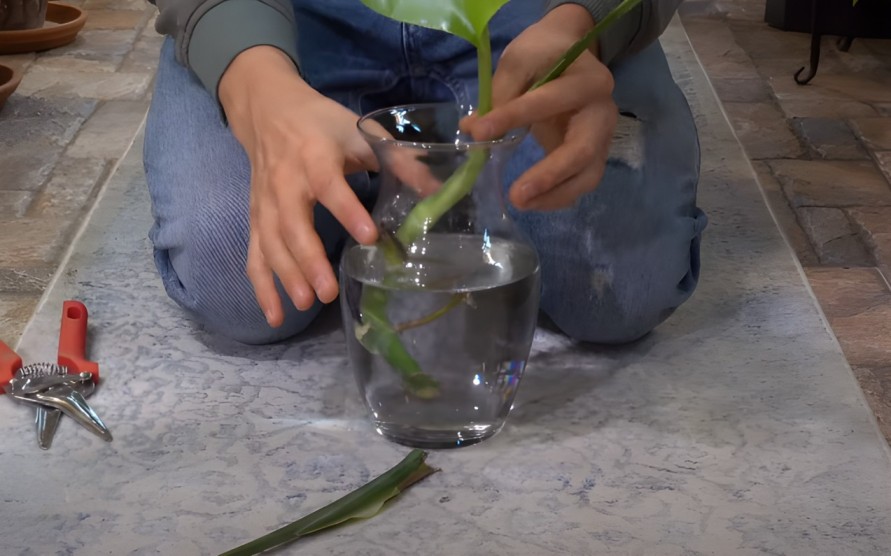
How To Propagate Monstera In Water
A common method of propagating monstera is by water. Cuttings can grow roots under controlled conditions, allowing you to observe their growth.
Materials
- Healthy monstera plant
- Sharp pruning shears or a sterile knife
- Clear glass container (vase, jar, or glass)
- Filtered or distilled water
Steps
- Stem cuttings should be healthy and at least 4-6 inches long with at least one node (the bump at the base of the stem where leaves attach). Stems that aren’t actively growing, but still look healthy and firm, are best to use.
- Make an angled cut just below a node with pruning shears or a knife. Node aerial roots (the long, thin roots growing from the stem) should be left intact.
- The lower leaves should be removed from the stem’s bottom 1-2 inches. Keeping the leaves in water will prevent them from rotting.
- You can place the cutting in filtered or distilled water by filling the glass container with water. Immerse the node and aerial root (if present) in water, making sure the stem is upright.
- Ensure that the container is placed in an area where it receives indirect sunlight. Sunlight can scorch leaves, so avoid direct exposure.
- To prevent bacterial growth and maintain oxygen levels, change the water every 3-4 days.
- Keep an eye on the stem to see if roots are developing. For roots to develop, it typically takes 2-4 weeks, but conditions and plant type can affect this.
- The monstera cutting can be transplanted into a pot of well-draining potting mix once the roots are 2-3 inches long.
How To Propagate Monstera In Soil
Before embarking on your propagation journey, ensure you have the necessary tools and materials:
- Monstera stem cutting
- Sharp pruning shears
- Well-draining pot
- Potting mix
- Rooting hormone (optional)
- Water
Preparing the Monstera Cutting
- A healthy Monstera stem node can be identified by identifying a healthy node. As a rule of thumb, the node should have a thin, brown aerial root growing from the stem.
- Cleanly cut the stem: Make a 45-degree cut using sterilized pruning shears below the node, leaving at least one to two inches of stem below the node.
- Make sure leaves that are submerged in soil are removed.
- Dip the cut end of the stem into rooting powder if rooting hormone is being used.
Planting the Monstera Cutting
- Place the Monstera cutting in the pot and fill it with potting mix, leaving some space for drainage.
- You can use a pencil or your finger to make a hole in the potting mix.
- Ensure the Monstera node is buried in the soil by carefully inserting the cut end of the stem into the prepared hole.
- Providing support to the cutting requires firming the soil around its base.
And this is the easy method to propagate monstera.
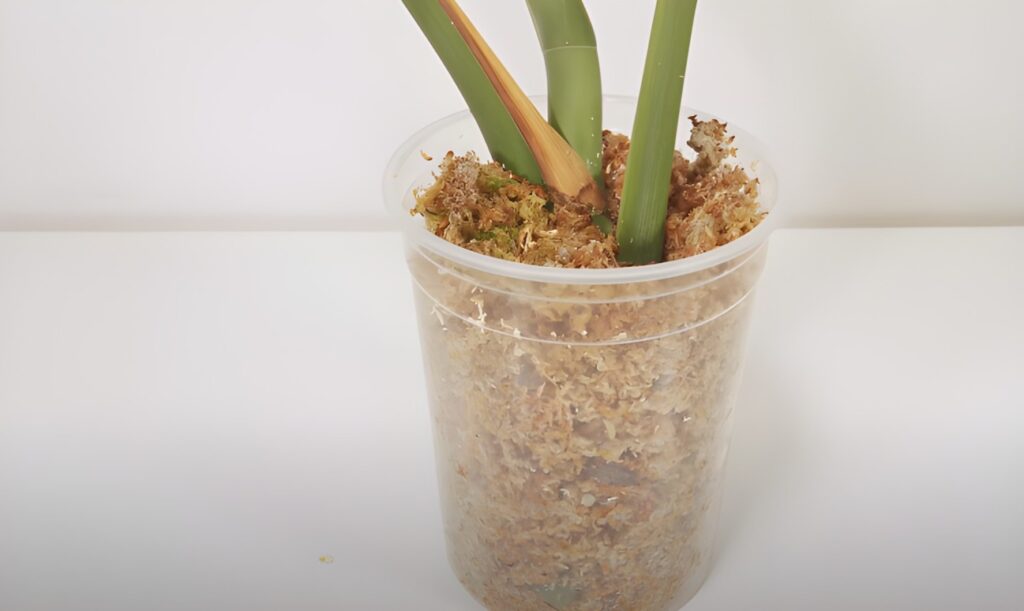
How To Propagate Monstera In Moss, Perlite Or LECA
Propagating Monstera in Moss
Moss is a natural and eco-friendly rooting medium that is easy to use. To propagate monstera in moss, you will need:
- A healthy monstera plant
- A sharp knife or pruning shears
- Sphagnum moss
- A container with drainage holes
- Take a cutting from your monstera plant. Choose a healthy stem that is at least 4 inches long. Make a cut just below a node, which is the point where a leaf or aerial root grows from the stem.
- Remove the lower leaves from the cutting. This will help to prevent the stem from rotting.
- Dip the end of the cutting in rooting hormone. This is not essential, but it can help to speed up the rooting process.
- Fill the container with moss. Make sure the moss is moist but not soggy.
- Insert the cutting into the moss. Place the node just below the surface of the moss.
- Water the moss gently. Avoid overwatering, as this can lead to root rot.
- Place the container in a warm, humid location. Bright, indirect light is ideal.
- Mist the moss regularly to keep it moist.
- Check the cutting for roots every few weeks. Once the roots are about an inch long, you can transplant the cutting to a pot of soil.
Propagating Monstera in Perlite
Perlite is a lightweight, inorganic rooting medium that is well-draining. To propagate monstera in perlite, you will need:
- A healthy monstera plant
- A sharp knife or pruning shears
- Perlite
- A container with drainage holes
- A monstera cutting should be taken. At least 4 inches should be the length of a healthy stem. Grasp a node just below it and make a cut.
- The cutting should be trimmed of its lower leaves. The stem will be protected from rotting this way.
- Rooting hormone should be dipped in the cutting’s end. The process of rooting can be sped up by doing this, but it is not necessary.
- Perlite should be filled into the container. Perlite should be evenly dampened.
- Cut the perlite and insert it into the cutting. The node should be placed just below the perlite’s surface.
- Perlite should be watered gently. Root rot can be caused by overwatering.
- Make sure the container is placed in a warm, humid environment. It is ideal to have bright, indirect light.
- To keep perlite moist, mist it regularly.
- Every few weeks, check for roots on the cutting. Transplant the cutting into soil after the roots have grown about an inch.
Propagating Monstera in LECA
LECA is a type of clay that is fired at a high temperature to create lightweight, porous pebbles. It is well-draining and does not hold onto water, which makes it a good choice for propagating monsteras. To propagate monstera in LECA, you will need:
- A healthy monstera plant
- A sharp knife or pruning shears
- LECA
- A container with drainage holes
- Choose a stem with a minimum length of four inches and make a cut just below a node on your monstera.
- It will help to prevent the stem from rotting if you remove the lower leaves from the cutting.
- Dust and debris should be removed from the LECA by rinsing it with water.
- The LECA should be filled into the container and dampened evenly.
- Place the node just below the surface of the LECA. Insert the cutting into the LECA.
- Overwatering can cause root rot in the LECA. Water gently.
- A bright, indirect light source is ideal for a warm, humid location.
- Keep the LECA moist by misting it regularly.
- As the cutting grows roots, you can transplant it into a pot of soil once the roots are about an inch long.
The No-Cutting Method: Air Layering Monstera
Air layering is a method of propagation that allows you to create new monsteras without harming your original plant.
What is Air Layering?
During air layering, a stem or branch is injured and then wrapped in moist moss or another rooting medium in order to root new plants. This is a relatively simple way to root plants.
After the roots have established well at the injured site, the new plant can be cut off from its mother plant and potted on its own.
Benefits of Air Layering for Monstera
Monstera can be propagated by air layering. This method is very successful, with a very high success rate.
Additionally, it is less stressful for the plant than cuttings, since the plant remains attached to the mother plant until its roots begin to grow.
The third advantage is that you can create new monsters without cutting into your healthy plant, reducing shock and infection risk.
How to Air Layer Monstera
Materials
- Sharp knife
- Sphagnum moss or other rooting medium
- Clear plastic wrap
- Rubber bands or twist ties
Instructions
- At least 6 inches long stems or branches of monstera should be selected.
- A leaf node is the point where a leaf connects to the stem. Make a shallow ring cut about 1 inch below the node with a sharp knife.
- The inner cambium layer can be exposed when the bark is gently peeled back.
- Make sure the moss is moist but not soggy. Wrap the exposed area of the stem with sphagnum moss or another medium for rooting.
- Put a rubber band or twist tie around the moss to keep it in place.
- Ensure that the plastic wrap is tightly sealed so moisture cannot escape the moss-covered area.
- For best results, you should place the air-layered stem in a warm, humid location under a cloche or in a plastic bag.
- Mist the moss regularly to keep it moist.
- Once the roots have established, you can cut the stem below the moss and pot up the new monstera. Once the roots have formed, you can remove the moss and pot up the monstera.
- And this is the still easy method to propagate monstera.
How To Grow Monstera From Seed
Growing Monstera from seed offers a unique and rewarding experience. This guide will walk you through the entire process, from selecting seeds to nurturing your Monstera seedling into a thriving plant.
Gathering the Essentials
- Monstera seeds
- Well-draining potting mix
- Seed-starting trays or small pots
- Choose containers with drainage holes
- Plastic wrap or a propagation dome
- These will help maintain humidity
- Heat mat (optional)
- This provides consistent warmth, promoting germination.
- Grow lights (optional)
Preparing the Seeds
Monstera seeds benefit from a pre-soaking period to enhance germination rates.
- After soaking the seeds for 12-24 hours in lukewarm water, remove them and drain.
- Floating seeds probably aren’t viable, so drain the water and discard them.
- Paper towels should be used to dry the remaining seeds.
Planting the Seeds
- Well-draining potting mix should be filled into seed-starting trays and small pots.
- Make sure the seeds are just barely covered in the potting mix after you have soaked them in water.
- Ensure that the potting mix is moistened thoroughly without becoming soggy by misting it thoroughly.
Creating a Humid Environment
Monstera seeds thrive in a humid environment. To achieve this:
- Plastic wrap or a propagation dome can be used to cover seed trays or pots.
- The temperature should be set to between 70 and 80°F (21-27°C) if you are using a heat mat.
- The trays or pots should be kept in a warm, well-lit location, but don’t let them be exposed to direct sunlight.
Monitoring Germination
Check the seeds regularly for signs of life in order to determine if they are germinating. Germination typically takes between 1-4 weeks, depending on the conditions.
- In order to acclimate them to lower humidity, gradually remove the plastic wrap or propagation dome after the sprouts emerge.
- Maintain moisture in the soil by misting it regularly.
- And this is the pretty easy method to propagate monstera.
Monstera Care
Understanding the Needs of Propagated Monstera Plants
There’s a reason Monstera plants are so popular today! They’re easy to care for, and they have large, heart-shaped leaves that add a touch of tropical comfort to any home.
It might be a good idea to propagate Monstera plants to create new plants for yourself or to share with family and friends if you have them.
Tips for Successful Care and Maintenance
Propagating a Monstera plant is relatively simple, but there are a few things you need to do to ensure that your new plant thrives.
Here are a few tips for successful care and maintenance
- To prevent the soil from becoming waterlogged, choose the right pot for Monstera plants, which have a large root system.
- Make sure your potting mix drains well: Monstera plants prefer organic-rich potting mixes. It is possible to make your own potting mix by mixing together equal parts peat moss, perlite, and vermiculite. You can use a commercial mix specially designed for Monstera plants.
- When the top inch of soil feels dry to the touch, water the plant deeply after a few days. Monstera plants should not sit in water.
- Direct sunlight can scorch the leaves of Monstera plants; instead, they need bright, indirect light.
- Use a balanced fertilizer diluted to half strength every few weeks during the growing season.
- It is recommended to mist Monstera plants regularly if your home is dry or place it on a tray of pebbles filled with water if your home is dry.
Troubleshooting Common Issues
If you’re having problems with your propagated Monstera plant, there are a few things you can do to troubleshoot the issue.
Here are a few common issues and how to fix them:
- In case the leaves are drooping, water the plant thoroughly and make sure you have drainage holes in the pot.
- Brown leaves: Make sure the soil around the plant is dry between waterings and increase humidity. If the soil is wet, allow it to dry out between waterings.
- When the plant’s leaves are yellowing, it may not be getting enough nutrients. Fertilize the plant once or twice a month during the growing season for best results.
- There are a few pests that are susceptible to Monstera plants, including mealybugs and spider mites. Insecticidal soap or neem oil can be used to treat pests on your Monstera plants.
Expert Tips on How to Propagate Monstera
The monstera plant is a very popular houseplant, and with good reason. They are easy to care for, beautiful, and can be propagated easily. Here are some tips on propagating a monstera plant:
Choose the Perfect Stem: The stem should be at least 4-6 inches long with at least two nodes, the nubs where leaves grow.
Remove the Cutting: Using a sharp blade or scissors, cut below the node and make sure the stem is not damaged during the cutting process.
Root in Water or Soil: The rooting of monstera cuttings can be done either in soil or in water. If you root in water, place the cuttings in a well-draining potting mix and soak them thoroughly in water.
Move Your Cutting to a Warm, Bright Spot: The Monstera needs a humid environment, so you should mist the leaves frequently. You should place your cutting in a warm, bright location that is out of direct sunlight.
Transplant Your Monstera Cutting: When your cutting has developed a strong root system, it is ready to be transplanted into a pot. Ensure that the potting mix is well-draining, and that the cutting is well watered.
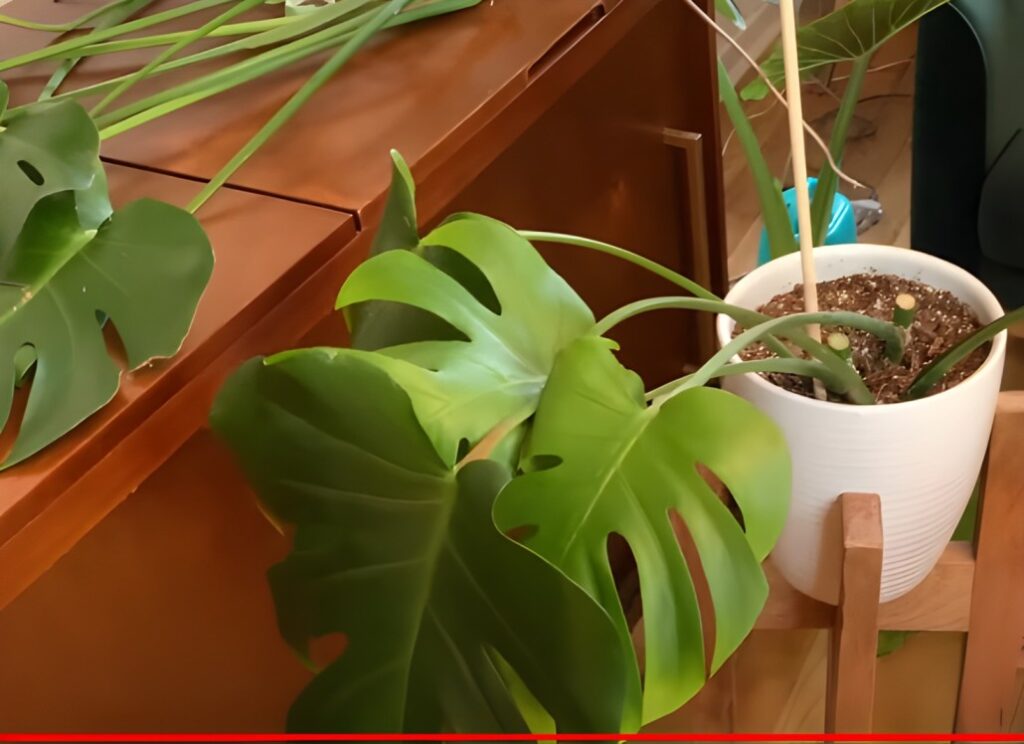
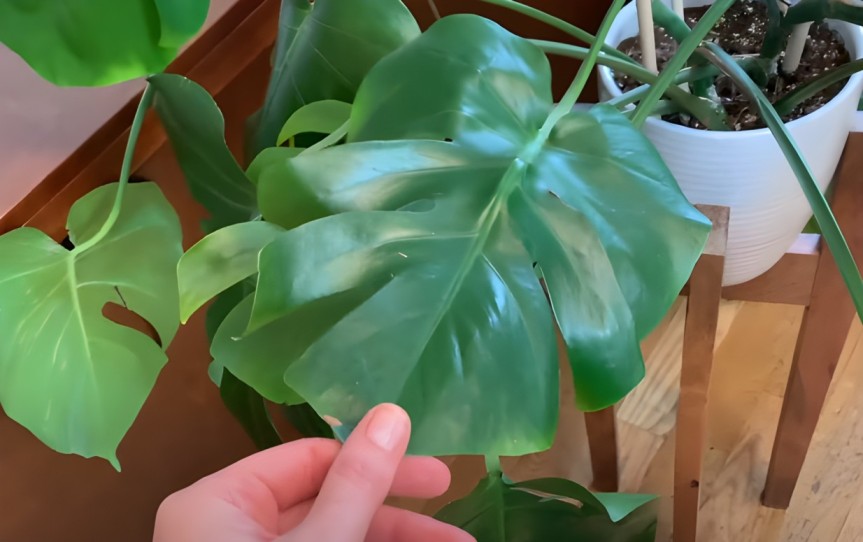
Plant Characteristics
The Swiss cheese plant, also known as Monstera deliciosa, has large heart-shaped leaves with distinctive fenestrations that make it a popular houseplant.
Plants require perforations to function properly. The fenestrations reduce leaf surface area, regulating transpiration, the process by which water vapor is released by plants.
As a native of tropical rainforests, Monstera delicious needs this adaptation to survive the high humidity levels and rapid water evaporation encountered there.
As a climbing hemiepiphyte, Monstera delicious grows mostly on trees. It anchors itself to these supports with aerial roots, which emerge from its stems.
In addition to absorbing moisture and nutrients from the air, these roots also absorb nutrients from the soil.
It is essential to understand Monstera delicious’s unique characteristics before propagating and cultivating it.
For instance, its fenestrations indicate that it requires a moderate level of humidity. As the aerial roots suggest, the plant prefers to climb on a supportive structure, such as a moss pole or trellis.
Monstera Propagation Care Tips
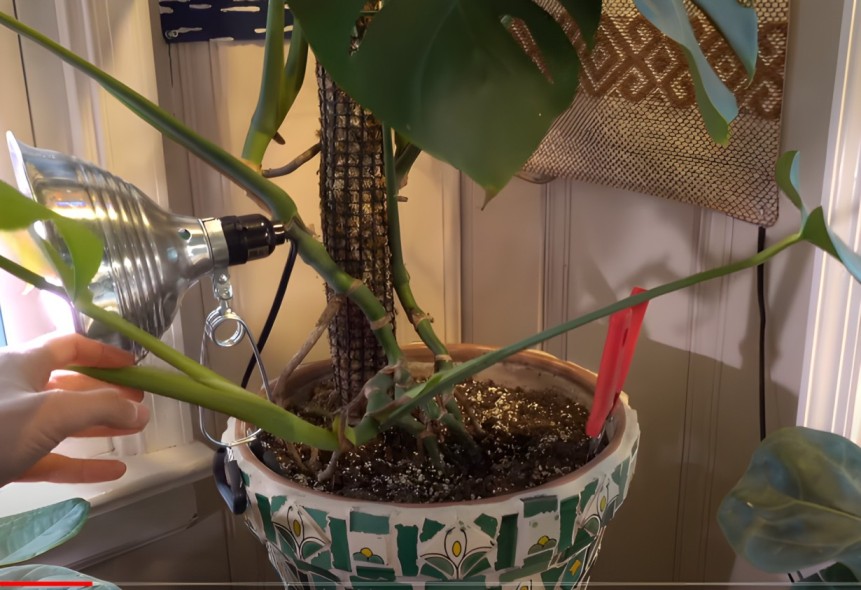
Insights into Specific Care Needs During the Propagation Process
Whether propagating monstera in water or soil, understanding their specific needs is crucial for success.
Water Propagation
- Fresh, clean water: Make sure to change the water every 2-3 days in order to prevent the growth of bacteria.
- Bright, indirect light: Keep the stems away from direct sunlight, which can scorch them.
- Warmth and humidity: Maintain a comfortable room temperature of 65-75°F and keep a humidifier or pebble tray handy.
Soil Propagation
- Well-draining potting mix: Ensure proper drainage to prevent root rot.
- Moist but not soggy soil: When the soil feels dry on top, water thoroughly.
- Humidity and warmth: Mist regularly and maintain a temperature range of 65-75°F.
Timelines, Patience, and Monitoring Growth
Patience is essential when it comes to rooting. Roots may not appear on monstera cuttings for several weeks. Check root development gently and monitor growth regularly.
When to Transplant Rooted Cuttings
The monstera cutting is ready for transplantation once the roots grow to 2-3 inches long. Fresh, well-draining potting mix should be used and the pot should be slightly larger than the root ball.
Exploring Monstera Propagation Methods: From Nodes to Aerial Roots
The basics of the Monstera plant encompass its origins, propagation methods, and care practices. Originating from the rainforests of Central America, the Monstera plant is renowned for its lush, hole-ridden leaves.
One common method of propagating this green beauty is through cuttings, particularly focusing on Monstera nodes. Nodes, essential growth points on the stem, are pivotal in the propagation process.
Delves into propagation methods, detailing how to propagate Monstera in water, potting water-rooted Monstera, and the process of propagating in soil.
A significant technique involves utilizing aerial roots for propagation, exploring the question of whether Monstera aerial roots can indeed be propagated.
Mastering Monstera Propagation: Techniques,and Tips
Delves into specific techniques and questions surrounding Monstera propagation. Encompassing when and how to propagate Monstera, the cluster addresses methods like cutting and propagating Monstera plants.
It even delves into propagating a mini Monstera, answering questions about propagating a broken Monstera leaf. On best practices and tips, explores the ideal time and ways to propagate Monstera, shedding light on aspects such as the best month and time for propagation.
It also shares insights on growing bigger Monstera leaves and addresses common questions like whether Monstera can be propagated in water or soil. Addresses specific techniques and questions, providing answers to queries like whether Monstera can be propagated without a node or leaf.
Techniques like air layering are explored, along with guidance on the timing and care needed for successful Monstera propagation. These comprehensive clusters cover everything from the basics to expert tips, offering a thorough guide for Monstera enthusiasts.
FAQs
Where do I cut Monstera for propagation?
A clean cut should be made just below the node, which is the point where a leaf or aerial root emerges. Aim for about 1-2 inches below the node.
Can you propagate Monstera in just water?
Water is a successful medium for propagating Monstera. Ensure the node of the stem is submerged in water after cutting the stem. Keep the water fresh and prevent bacterial growth by changing it every few days.
Does Monstera need sun?
Sunlight that is bright and indirect is optimal for Monstera. The leaves can be scorched by direct sunlight. Ideally, it should be near a window facing east or south.
How do you propagate Monstera in Moss?
Moist sphagnum moss should be added to the container. The cut stem should be inserted into the moss through a slit in the moss, with the node nestled within the moss. Put rubber bands or string around the stem and wrap it with the moss. Don’t let the moss get soggy, but keep it moist.
When is the best time to propagate a monstera plant?
In spring and summer, Monstera plants are actively growing, making them optimal times for propagation.
How long does it take to propagate a monstera?
Water roots typically take 2-4 weeks to develop, while moss roots take 4-6 weeks to develop. After the roots have developed, you can transplant the cutting into a pot with potting soil.
Where do I cut on monstera to propagate?
Whenever a leaf or aerial root emerges from a node on the stem, cut it just below it. The node should be 1-2 inches below the surface.
Can you root monstera cuttings in water?
It is possible to root Monstera cuttings in water successfully. The cut stem can be soaked in water by placing it in a glass or jar. Keep the water fresh and prevent bacterial growth by changing it every few days.
How long does monstera take to root in water?
In water, roots typically develop in two to four weeks. It is best to plant a cutting in potting mix once the roots are well developed.